So you’ve scoured the internet and decided that it is worth your time and effort to learn Angular, an open source web development framework maintained by Google. However, you’re looking at all of the resources available to you and it’s overwhelming — where do you start, how do you break the complex framework that is Angular, down? A good place to start is always the basics but, with Angular, what are the basics?
Before we start there are a few things you might want to review before stepping into Angular if they are unfamiliar to you. In order to harness the power of Angular you’ll want to be familiar with HTML and CSS (or your CSS pre-compiler of choice, such as SASS). W3 Schools is a great place to start learning these two fundamental web technologies [https://www.w3schools.com/css/ , https://www.w3schools.com/html/]. Angular is developed primarily using JavaScript, and more specifically, TypeScript. If you’re unfamiliar with JavaScript a fairly comprehensive tutorial is available here: es6 for Beginners. However, if you are familiar with JavaScript, but not TypeScript that’s alright. TypeScript transforms JavaScript into a strongly-typed language, therefore, if you have any experience with languages like Java or C#, it should come naturally. If you’d like to dive into the specifics of TypeScript a little more before continuing with Angular then checkout the TypeScript documentation. If you’re at least mildly comfortable with the technologies discussed above, then fantastic, let’s get started working with Angular.
The Angular Command Line Interface
The Angular Command Line Interface (CLI) helps developers get their projects started more quickly, ensures you have all the files required when making new components in Angular, and can even help you get your project locally deployed in seconds. Before we go into some of the commands of the Angular CLI we need to install it. To do so, simply open up a new command prompt/terminal and enter:
npm install -g @angular/cliIf you’re having troubles, please note that this requires you to have node.js installed on your development machine. If you haven’t already, I strongly encourage you to do so, simply head over to https://nodejs.org/en/ and download it now. Once you’ve done so, try running the command above again. Npm stands for node package manager, and will take care of getting angular installed globally on your machine (the –g argument ensures global installation, if you missed this, simply run the command again with the –g argument exactly as shown above).
Using the Angular CLI we can create our very first application. I’ll be creating a simple application that only has a Login at this time. To create a new application, navigate to the directory you’d like that application to live in, and enter the command:
ng new app-nameLet’s understand this command a little further. At the start, the ng prefix lets our computer know that this is an Angular CLI command, new specifies we are creating a new Angular application, and app-name can be anything you want your new application to be called. Angular will ask you two questions, if you want to add Angular Routing, and which stylesheet format you’d like to use.

Feel free to add routing, and pick the stylesheet format of your choice. Afterwards, the CLI will run for a little while, and before you know it, your first Angular app will exist! At this point, we’re ready to talk about some of the other Angular basics, so you’ll want to go ahead and open your new Angular application in your code editor of choice — I highly recommend Visual Studio Code https://code.visualstudio.com/Download, the integrated CLI makes Angular development even easier.
Initial Structure and Running Your Application
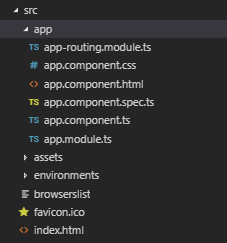
Once your Angular application is open inside of your code editor you’ll see a number of files and folders. Expand the src (aka source folder), and you’ll see that we’ve got a lot more going on inside. Go ahead and expand the app folder, it is here that you’ll spend most of your time while developing an Angular application.
As you get more experienced with Angular development you’ll become intimately familiar with the files you see here; however, for now, open the app.component.html file. Here you see everything that is initially shown when you run your Angular application. In order to see that in action, let’s run our application, make some changes, and then we can move on to making our own components.
Open the terminal (on VSCode the shortcut is ctrl + `) and enter ng serve –o.
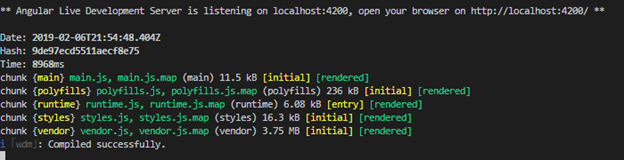
You’ll see a message similar to the one above, and since we used the –o option when running ng serve, you’ll also have a browser open and you’ll see your Angular application up and running! If you’ve closed the browser, or forgot the –o option, simply open a browser and navigate to http://localhost:4200/, or the port indicated by your Angular Development Live Server.
We can make changes to our Angular application while the Angular Live Development Server is open. If you head back to the app.component.html file you can delete everything, except for the final <router-outlet></router-outlet> tags. Replace that deleted markup with some simple html, like an <h1>MY FIRST ANGULAR APP!!</h1>, then save and watch as your Angular Live Development Server changes dynamically.
Angular Components
Now that we’ve got a basic Angular application up and running it is time to add some components, but what are Angular components? Simply, they are the most fundamental basic building blocks of an Angular application. A finished Angular application will be composed of all of your components working together as individual, modular pieces. For our simple Angular application, we will only make one additional component, a Login component. However, you’ve already got one component — app — that is the root of your entire application. Before creating our first component, we should discuss the parts of a component, of which there are 4.
The component-name.component.spec.ts file defines some fundamental Angular behavior, and while you’re learning the basics it is best to just steer clear of this file.
The component-name.component.css file defines style specific to the component in question, styles defined here will not be replicated in other components. This allows you to style a component in one project, and take it to another project in its entirety without effecting the project you took it from or the project you place it into. If you chose SCSS, SASS, or LESS when creating your application with the CLI rather than CSS, then the extension of this file will reflect that difference.
The component-name.component.html file is where all of your html markup that defines the content of that component will go, it is also known as the template file. For instance, when we deleted all of the data in the app.component.html file and added our own html markup, we were changing the content of the app component.
Finally, the component-name.component.ts file is where the logic specific to your component will go, it is often referred to as the class file and is composed of TypeScript code. It is in this file that you will spend the majority of your time with a component typically. If you investigate the app.component.ts file we created you’ll find that there isn’t much there, and that is how your other .ts class files will begin as well.
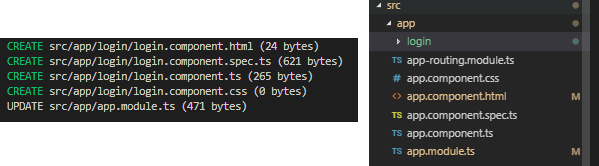
In order to create our first component simply open up the terminal and enter the command ng generate component login (if your development server is still running you’ll need to enter this command into a new terminal window). The Angular CLI creates the new component including the four files aforementioned, and inserts the dependencies throughout the rest of the application for you. The result of the command should look similar to what is below, and in your file directory you’ll notice a new folder that shares the name of your new component, login.
@Component({
   selector: 'app-login',
   templateUrl: './login.component.html',
   styleUrls: ['./login.component']
})

export class LoginComponent implements OnInit {}
In order to get this component showing up on your Angular application there are a few short steps. If you open the class file for the login component (login.component.ts) you’ll see a section at the top annotated with @Component. The selector parameter defines the name of the tag that we will use to insert the login component into another component, in our case we will place the login component into the app component.
<h1>MY FIRST ANGULAR APP</h1>
<app-login></app-login>
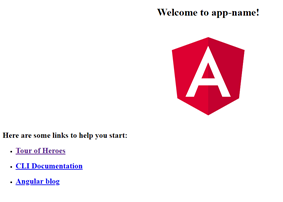
<router-outlet></router-outlet>Open the app.component.html file and insert the tag <app-login></app-login> underneath the other html markup you added earlier. Your app.component.html file should now look very similar to the image to the right.
Looking back at our development server you’ll see the text “login works” appended to the web page. This text comes directly from the login.component.html file, feel free to go and change it a bit and watch your application change as well.
Before we go, lets add some dynamic action to our login component. In the login.component.html file add the following code:
<button (click)="toggleText()">Click me!</button>

<div *ngIf="show">Here is my super fancy dynamic text</div>
In the first line, instead of defining an onclick event for JavaScript we instead use the Angular syntax (click) to achieve the same effect. When the button is clicked, the toggleText method of the login.component.ts file will be called.
In the second line of code we take advantage of an Angular structural directive, *ngIf (the * is a part of the syntax, try not to forget it). This div will appear if and only if the show property of the login.component.ts file is true.
In order to make the html markup we just added work, we need to add the toggleText method and show property to our class file. In login.component.ts add the following code:
show: boolean = false;

toggleText() {
    this.show = !this.show;
}
In the first line, we create a variable called show, of type boolean and set it to false. In the method below, we simply change the value of that variable to be the opposite of what it currently is. In your Angular development server, you should now have a button that says “Click me!”, that when clicked, shows or hides the text in the div that makes use of the Angular structural directive *ngIf.
Next Steps
Go ahead and add some more markup to our login template file, don’t worry about it being a login for now. Add some lists, headers, and buttons, and add some methods to the login class file. If you’d like to explore some more of the Angular structural directives available start here: https://angular.io/guide/structural-directives.
In the next post I’ll discuss Services in Angular and how we can utilize dependency injection in Angular with our login component to use an external class to validate a user attempting to login as retrieved from a form written in html.
References
https://angular.io/guide/structural-directives
https://angular.io/guide/architecture-components


 Javascript Immediately Invoked Function Expressions (IIFE)